Making a complete file uploader with progressbar using Livewire and Alpinejs
I recently had to create a file uploader that allowed the user to both click a button and select files, or simply drag files unto the page. I decided to give Livewire a shot as it seemed interesting. My first thought was to use a js package like resumeable.js or DropZone, but after reading Livewires file upload docs, I figured it might be easier to just use the built in system and extend it with some simple JavaScript.
You can see a demo of the final code here
This guide assumes that you have already installed the latest laravel and livewire 2.x.
Making the upload component
First lets create the livewire component. Run this in your terminal
php livewire:make FileUploaderThis should give you two new files. /app/Http/Livewire/FileUploader.php and /resources/views/livewire/file-uploader.blade.php
Designing the uploader
For designing layouts I prefer to use TailwindCss, so I will use that throughout this guide. But feel free to replace it with whatever css framework (or custom css) that you like.
For simplicity I am making this as a full page component, but it should work inside a blade view as well. Just remember to have both livewire scripts and the alpine cdn included in the layout.
Add a file in /resources/views/layouts/app.blade.php with this content
1<head>2 @livewireStyles3 <script defer src="https://unpkg.com/alpinejs@3.x.x/dist/cdn.min.js"></script>4</head>5<body>6 {{ $slot }}7 8 @livewireScripts9</body>Note that I am using the tailwind play cdn. I recommend replacing this with tailwind that is actually compiled with either vite or laravel mix.
Add this routes to web.php
1Route::get('file-uploader', \App\Http\Livewire\FileUploader::class)Open /resources/views/livewire/file-uploader.blade.php and paste this html into it
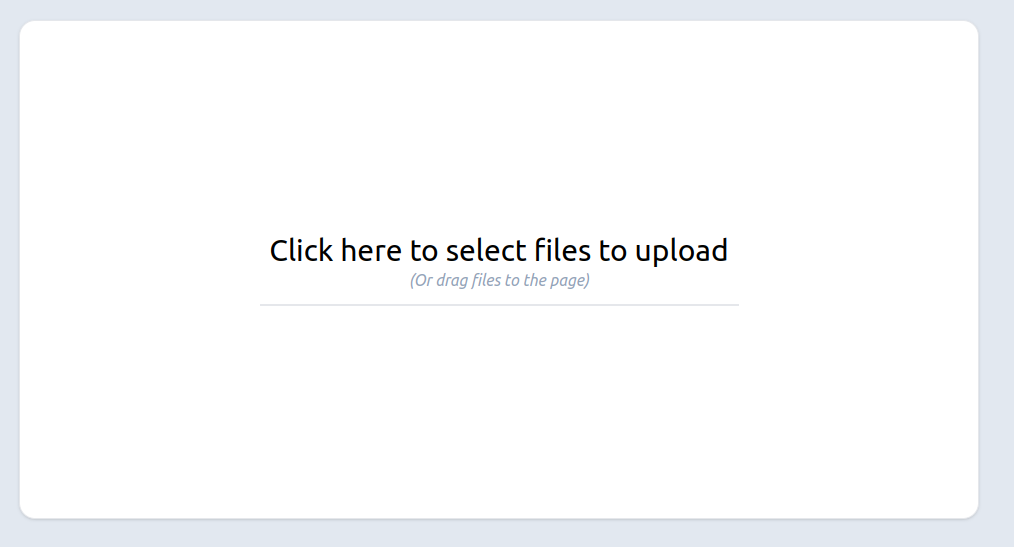
1<div> 2 <div class="flex flex-col items-center justify-center h-screen bg-slate-200"> 3 <label class="flex flex-col items-center justify-center w-1/2 bg-white border shadow cursor-pointer h-1/2 rounded-2xl hover:bg-slate-50" for="file-upload" 4 > 5 <h3 class="text-3xl">Click here to select files to upload</h3> 6 <em class="italic text-slate-400">(Or drag files to the page)</em> 7 </label> 8 <input type="file" id="file-upload" multiple class="hidden" /> 9 </div>10</div>This will give us a simple layout with a huge "button" that lets us click it to select the files to upload. This works by using a label as the container, and linking it to a hidden file input.
Getting upload working
To make our code a bit cleaner we will add a script tag inside the page to set up the data for alpine first. It will just return an object with some defaults we will use later. Add x-data="fileUpload()" to the outermost div, and add the script shown below. Be sure to nest it inside the outermost div, as livewire does not like multiple root elements.
1<div x-data="fileUpload()"> 2 <div class="flex flex-col items-center justify-center h-screen bg-slate-200"> 3 <label class="flex flex-col items-center justify-center w-1/2 bg-white border shadow cursor-pointer h-1/2 rounded-2xl hover:bg-slate-50" for="file-upload" 4 > 5 <h3 class="text-3xl">Click here to select files to upload</h3> 6 <em class="italic text-slate-400">(Or drag files to the page)</em> 7 </label> 8 <input type="file" id="file-upload" multiple class="hidden" /> 9 </div>10 11 <script>12 function fileUpload() {13 return {14 isDropping: false,15 isUploading: false,16 progress: 0,17 }18 }19 </script> 20</div>Normally when you add a file input to the page with livewire, you would simply use wire:model to automatically upload the files as they are added (to a temp directory). But as we need to implement the upload when dragging files, it makes sense to implement this ourselves as well. Luckily livewire makes this very simple.
Add a new function inside the returned object in the script
1<script> 2 function fileUpload() { 3 return { 4 isDropping: false, 5 isUploading: false, 6 progress: 0, 7 handleFileSelect(event) { 8 if (event.target.files.length) { 9 console.log(event.target.files)10 }11 }, 12 }13 }14</script>and add the script to the file inputs @change hook
1<input type="file" id="file-upload" multiple @change="handleFileSelect" class="hidden" />Now try clicking the button and select a file. Open the browser console (F12) and you should see a log of the file being added.
Now for the actual upload.
First we will add the WithFileUploads trait to the component to tell livewire that we want file uploads. Next we add a new public property to the component class to have a place for livewire to store a reference to the files.
1<?php 2 3namespace App\Http\Livewire; 4 5use Livewire\Component; 6use Livewire\WithFileUploads; 7 8class FileUploader extends Component 9{10 use WithFileUploads; 11 12 public $files = []; 13 14 public function render()15 {16 return view('livewire.file-uploader');17 }18}Livewire has a few handle built in helpers for uploading files which we can use. https://laravel-livewire.com/docs/2.x/file-uploads#js-api
So we add a new method to handle all uploads called uploadFiles(). It receives the files and uses the livewire @this.uploadMultiple() function to upload them to the livewire component. Note that the first argument is the name of the public property in the component class. Not that I am rebinding this to $this. This is because the this changes when inside the functions of each callback in the upload. This could also be handled by using arrow functions
1<script> 2 function fileUpload() { 3 return { 4 isDropping: false, 5 isUploading: false, 6 progress: 0, 7 handleFileSelect(event) { 8 if (event.target.files.length) { 9 this.uploadFiles(event.target.files)10 }11 },12 uploadFiles(files) {13 const $this = this14 this.isUploading = true15 @this.uploadMultiple('files', files,16 function (success) { //upload was a success and was finished17 $this.isUploading = false18 $this.progress = 019 },20 function(error) { //an error occured21 console.log('error', error)22 },23 function (event) { //upload progress was made24 $this.progress = event.detail.progress25 }26 )27 } 28 }29 }30</script>First we set the upload to have started with this.isUploading = true. We then update the other attributes based on the upload status.
Now before we test it out, it might be nice to be able to see the files, so let us update the view to show them. Lets add some code right after the <label> to show the files
1<label class="flex flex-col items-center justify-center w-1/2 bg-white border shadow cursor-pointer h-1/2 rounded-2xl hover:bg-slate-50" 2 for="file-upload" 3> 4 <h3 class="text-3xl">Click here to select files to upload</h3> 5 <em class="italic text-slate-400">(Or drag files to the page)</em> 6</label> 7 @if(count($files)) 8 <ul class="mt-5 list-disc"> 9 @foreach($files as $file)10 <li>{{$file->getClientOriginalName()}}</li>11 @endforeach12 </ul>13@endif Now try selecting a file again, and this time you should see the file names show up in a list.
Dropping files
Dropping of files is actually quite easy to implement now that we have the regular upload working. First we will add a function similar to the one used for file selection.
1<script> 2 function fileUpload() { 3 return { 4 isDropping: false, 5 isUploading: false, 6 progress: 0, 7 handleFileSelect(event) { 8 if (event.target.files.length) { 9 this.uploadFiles(event.target.files)10 }11 },12 handleFileDrop(event) { 13 if (event.dataTransfer.files.length > 0) {14 this.uploadFiles(event.dataTransfer.files)15 }16 }, 17 uploadFiles(files) {18 const $this = this;19 this.isUploading = true20 @this.uploadMultiple('files', files,21 function (success) {22 $this.isUploading = false23 $this.progress = 024 },25 function(error) {26 console.log('error', error)27 },28 function (event) {29 $this.progress = event.detail.progress30 }31 )32 }33 }34 }35</script>Next we will let the whole page accept file drops. Luckily AlpineJs has built in checks for file drops, so it is very easy add.
1<div x-data="fileUpload()">2 <div class="flex flex-col items-center justify-center h-screen bg-slate-200"3 x-on:drop="isDroppingFile = false"4 x-on:drop.prevent="handleFileDrop($event)"5 x-on:dragover.prevent="isDroppingFile = true"6 x-on:dragleave.prevent="isDroppingFile = false"7 >Now drag a file onto the page, and it should just work!
For the sake of completion, lets just add a quick overlay on the page so its obvious we are inside the drop zone.
1<div x-data="fileUpload()"> 2 <div class="relative flex flex-col items-center justify-center h-screen bg-slate-200" 3 x-on:drop="isDropping = false" 4 x-on:drop.prevent="handleFileDrop($event)" 5 x-on:dragover.prevent="isDropping = true" 6 x-on:dragleave.prevent="isDropping = false" 7 > 8 <div class="absolute top-0 bottom-0 left-0 right-0 z-30 flex items-center justify-center bg-blue-500 opacity-90" 9 x-show="isDropping"10 >11 <span class="text-3xl text-white">Release file to upload!</span>12 </div>Here we add relative to the div that covers the page, and adds a simple overlay div that is shown whenever we are dragging over the page.
I am aware that there is some flickering when the file is right on top of the text in the middle of the page. Sadly I have yet to find a solution for this. Let me know if you find a solution so I can update the guide. @rsinnbeck
Adding a progress bar
To complete our file uploader, I think it would be great with a progress bar.
At the bottom of our <label> we can add a small bar that gets filled whenever we upload anything.
1<label class="flex flex-col items-center justify-center w-1/2 bg-white border shadow cursor-pointer select-none h-1/2 rounded-2xl hover:bg-slate-50" 2 for="file-upload" 3> 4 <h3 class="text-3xl">Click here to select files to upload</h3> 5 <em class="italic text-slate-400">(Or drag files to the page)</em> 6 <div class="bg-gray-200 h-[2px] w-1/2 mt-3"> 7 <div 8 class="bg-blue-500 h-[2px]" 9 style="transition: width 1s"10 :style="`width: ${progress}%;`"11 x-show="isUploading"12 >13 </div>14 </div>15 16</label>And just like that we can see the progress of the uploads! Be aware that you might not be able to see the progress bar move at all, as the uploads are so fast when working locally. Therefor it might be a good idea to enable throttling in the browser, so you can actually see it progress: https://www.browserstack.com/guide/how-to-perform-network-throttling-in-chrome
Append uploads
You might notice that if you add files in more than one go, it will replace all the files from earlier. This is due to the fact that, livewire just throws away old files when using @this.uploadMultiple(). Luckily we can just overwrite the upload function for this component to force it to merge the uploads.
Add a finishUpload() method to the component class
1<?php 2 3namespace App\Http\Livewire; 4 5use Livewire\Component; 6use Livewire\TemporaryUploadedFile; 7use Livewire\WithFileUploads; 8 9class FileUploader extends Component10{11 use WithFileUploads;12 13 public $files = [];14 15 public function finishUpload($name, $tmpPath, $isMultiple) 16 {17 $this->cleanupOldUploads();18 19 $files = collect($tmpPath)->map(function ($i) {20 return TemporaryUploadedFile::createFromLivewire($i);21 })->toArray();22 $this->emitSelf('upload:finished', $name, collect($files)->map->getFilename()->toArray());23 24 $files = array_merge($this->getPropertyValue($name), $files);25 $this->syncInput($name, $files);26 } 27 28 public function render()29 {30 return view('livewire.file-uploader');31 }32}And that should be it! Now you can just keep adding files without them being removed. This "fix" is courtesy of this issue I found on Livewires github
Removing uploaded files before submit
As the files are only uploaded to a temp folder, you of course want to submit the form to finally save them. But perhaps the user added a file by accident and want to remove it without starting over. Let's add a remove button!
1@if(count($files)) 2 <ul class="mt-5 list-disc"> 3 @foreach($files as $file) 4 <li> 5 {{$file->getClientOriginalName()}} 6 <button class="text-red-500" @click="removeUpload('{{$file->getFilename()}}')">X</button> 7 </li> 8 @endforeach 9 </ul>10@endifWhen the user clicks it, it will call a function in AlpineJs that does the removal
1<script> 2 function fileUpload() { 3 return { 4 isDropping: false, 5 isUploading: false, 6 progress: 0, 7 handleFileSelect(event) { 8 if (event.target.files.length) { 9 this.uploadFiles(event.target.files)10 }11 },12 handleFileDrop(event) {13 if (event.dataTransfer.files.length > 0) {14 this.uploadFiles(event.dataTransfer.files)15 }16 },17 uploadFiles(files) {18 const $this = this;19 this.isUploading = true20 @this.uploadMultiple('files', files,21 function (success) {22 $this.isUploading = false23 $this.progress = 024 },25 function(error) {26 console.log('error', error)27 },28 function (event) {29 $this.progress = event.detail.progress30 }31 )32 },33 removeUpload(filename) { 34 @this.removeUpload('files', filename)35 }, 36 }37 }38</script>This again just uses a built-in livewire method to remove the file. Now you just need to add validation and the form submission yourself.
The end
I hope that this guide helped you build something great. Feel free to reach out if you feel this guide is missing something or has any mistakes. @rsinnbeck